VG30 FORGED PISTON COMPARISON

I get a lot of phone calls every week regarding parts selection and pricing on components.  Many ask me whats the best piston to run or what I feel is the best for certain applications.  While I have my own view on certain parts and criteria in which they can be used for or should be used for I feel that ultimately the customer should be educated well enough to make the best decision for his/her self instead of running what X person suggests.  After all, I can only suggest what I consider the best or most viable option, the customer at the end of the day is the one who ultimately makes the decision on the final call of what they want to purchase and run in their assembly.

So lets talk about what pistons on the market are available (off the shelf) for the VG30DE engines.  We have CP Pistons, Wiseco, Ross, Probe, (discontinued recently but if you can find a set online new GRAB THEM!) JE, (which I have found out are made in Wisecos factory) & Arias.  Im sure there are some others that are available or made for our platform but these are the ones that are most commonly used in building a VG30 engine.

The two pistons I’m going to select to make a good comparison on are between CP and Wiseco.  The reason for this is because out of 10 builds I produce at random these are the two most widely used pistons in the VG30 outfit.  So I will do a break down on comparisons regarding each piston and what I personally like about each one over the other and the drawbacks.

Lets start with WISECO PISTONS.  Great piston, quality, 2618 forging, readily available, affordable and has some great qualities to list.  They are among one of the most top picked pistons for the VG30 and are advertised more with rebuild kits than most others, mainly because of the attributes I stated above.

So what are some specs that I like about the Wiseco piston (Part # K549M88).  Lets look at the top ring land.  It is the largest (tallest) out of any of the top ring lands on any other forged piston on the market.  It has integrated detonation grooves that prevent carbon-buildup from locking up the top ring and help keep the air and fuel in suspension. The accumulation of gases that get by the top ring can unseat it, and the pressure groove delays this action.  They protect the top ring by disrupting detonation waves as well.  These grooves limit the piston/cylinder contact during high temperature and RPM. This is the only piston that I know of that has this feature standard off the shelf in their design.

Another feature is a floating pin bore.  What does this mean?  A floating pin bore simply means that the pin once installed in the pin bore of the piston it rides on a thin film of oil which is commonly called pin floating, hence floating pin bore.  Oil is supplied through a single oil feed hole that is provided by the bottom oil expansion ring groove.  It is very important to clearance the pin bore for the wrist pin on moderate to high HP engines or engines that see a lot of abuse.  The added clearance helps prevent galling and allows for a smoother rotating assembly and helps keep the parts cooler and working order longer.

Thin ring technology, this is great because the thinner the ring is the less friction it has going up and down in the cylinder bore.  The trade off is the “type” of ring you run that comes in the piston kit from Wiseco.  Wiseco uses a standard scraper 2nd ring which acts similar to a napier ring but not quite.  Its positive function on scraping the excess oil off the cylinder walls helps in preventing oil consumption as well as blow by relief.  A napier or THG (tapered hook groove) ring provides a superior scraping affect and prevention of blow by compared to a standard scraper ring.  The top ring is a chrome steel nitride ring that resists high heat, less friction wear resistance and is highly durable.  The oil or expansion rings are standard ear angle which are common on most pistons.

Wiseco pistons feature a straight side wall which reduces overall weight of the piston, which is nice, but does lend a draw back that creates a thin spot surrounding the outside area of the pin bore.  Some consumers have had issues with the Wisecos cracking around the pin bore and I’ve diagnosed this issue to be directly related to them not adding clearance to the pin bores as I’ve mentioned above.  You have to remember the more abuse you put on parts the more they will want to move and distort, giving them some breathing room or area to move greatly reduces premature failure.  This rule of thumb can be applied to nearly every aspect of a race engines parts.

The Wiseco shelf piston weighs in at 341 grams making it one of the lightest pistons on the market.  That’s a good thing because the lighter you can make a rotating assembly the more response it will have and it will enable the engine to rev more freely and effortlessly.

So overall I give this piston a thumbs up for not only being affordable, readily available,but also having the tallest ring land of any piston but its one of the lightest pistons on the market.

Now lets talk about the CP PISTONS.  Robust, 2618 forging, radius shoulder side walls, shorter piston by design, premium machining details, and reasonably affordable.  The CP in is my favorite piston and for a few good reasons.

The first thing I want to bring up is that this piston as well has a floating pin bore design.  However what makes this one different is that it has a twin feed for oiling of the wrist pin.  Added oil prevents unwanted heat build up and certainly aids in keeping the pin coated in oil more efficiently. Wrist pins are made of 5100 series chrome moly steel just like the Wisecos are.  HP rating of 600HP PER PIN (Both Wiseco & CP)

The CP piston does not have a taller top ring land but the deck thickness from the inside of the piston at the underside of crown to the top of the crown is solid.  Even though the Wiseco has a taller top ring land it isn’t solid the entire diameter on the underside of the piston.  The design in the forging is different than that of the CP.

CP runs a double walled thick 2nd oil ring which is very stout and does a decent/good job at retaining oil down to the sump.  The top ring is a single walled thickness and is chrome nitride steel like the Wiseco variant.  The CP does not use thin ring technology but thats ok, I feel they make up for it in the attention to detail with their machining of their pistons.  CP does however use an accumulator groove which is a V shaped groove machined in the 2nd ring land to collect excess blow-by between the top and second ring. This groove collects residual gasses during combustion and alleviates top ring flutter while increasing ring seal.  I normally get better compression numbers and ring seal with the CP ring package than I do with a Wiseco but every engine is different as well as the application in which they are built for so take that statement with a grain of salt.  Its just something I’ve picked up on in dealing with these pistons for many years. The oil expansion ring is standard ear design like the Wiseco so those are on part with each other.

Radial shoulder side wall.  BIG improvement over the Wisecos.  At the pinch near the pin bore of the piston between the Wisecos and the CP, the CP trumps the Wiseco in thickness by nearly .050″.  Thats quite significant.  Having the shoulder side wall radius machined does yield the CP as the heavier contender as there is less material that has been removed but in my eyes the rigidity factor and material thickness in this key area is more reason to run this piston over Wiseco.  The CP weighs in at 347 grams making it 6 grams heavier than the Wiseco unit.

BUT there is a price factor to take into consideration.  Wiseco, while very formidable comes in at approx $620 USD give or take depending vendor of choice compared to CP which retails anywhere from $775-$900 depending the vendor.  Thats a significant difference in price between the two.  So ultimately the consumer really has to weigh out their options on what they want to invest in.  I honestly like both pistons for their own reasons.  If you are targeting a price point, Wiseco hands down is the way to go.  If you are more concerned about quality of machining and overall improvements over what Wiseco offers CP is hands down your choice.  There really is a lot to take into consideration when looking at these two pistons.  Its a tough choice but I want consumers to be educated to what they are buying and not fed a bunch of hearsay from random individuals.  My personal preference…well I am more of a refinement type of individual so my trust lay with CP but let me say this, I’ve built MANY engines that have made 800-1000HP using the Wisecos with no affects at all.  If built properly and details attended to, the Wisecos can have a solid chance to become your next piston choice.

Here are some side by side comparison images of both a CP piston and a Wiseco piston for you to see.

I hope if anything you’ve seen differences as well as advantages between both units shown today.  Remember both pistons are good for their own reasons and can withstand a lot of power and abuse.  Choose whatever piston you want to run for good reason rather than by what some random individual says.  It always pays to do your homework and research the details so you make a better conscious decision on what parts to buy.  And ALWAYS consult your engine builder/machinist they normally have the upper hand on what is good and what isn’t from experience and handling products.  These are the individuals that really know and can help you decide beyond what research you’ve done on your own.

Thanks for reading!

EP Racing Dual Oil Squirter

Oiling systems are very important to any and all engine types and setups.  My focus with the Nissan platforms is to take whats already available and find their weak points and tackle them to make them better.  Cooling by way of oil is a very important aspect of engine life and sustainability.  Overall, if you can keep your outfit running more efficient and better cooled your engine will out perform others and do so consistently.  For years manufactures have outfitted turbocharged and or supercharged engines with oil piston squirters.  Their function is to spray/stream oil to a designated area under the piston to cool them down.  The oil there by absorbs some of the heat and carries it down to the sump.  Oil on some outfits is then pumped to an oil cooler where oil has a chance to really cool down and return to the engine for more work.

The VG30DE series engine has oil squirters outfitted in the block (3) feeding off the main return oil galley.  The OE squirter is a split design and covers 2 pistons at the same time.  Nissan developed 2 different styles, one for the twinturbo outfit and the other for a non turbo setup.  The two are the same but slightly different in spray pattern.

(The “cleaner” (new looking) oil squirter is the NA one and the TT one is the oil stained one)

So where do we look now?  Well its always a good idea to keep your parts running cool right?  A new idea was envisioned and a drawing was made.  My idea to further the oils ability to cool the piston was finally down on paper.  With the continuing effort to produce more HP and TQ the engines see more heat and stress.  So there has to be new efforts in coping with these new temperatures and stress levels.  The idea is to control the oil on both sides under the crown of the piston there by allowing the oil to absorb as much heat as possible.  Aiding in preventing detonation and improving the engines ability to keep cool under heavy load and conditions, this new development hopefully will bring new ways of keeping high performance VG30s alive longer.

This is not the final version of this oil squirter, but you can see what development is being done.  I am continuing work on this and hopefully this year I can have a set of 3 to run tests with.  Stay tuned!  More things are soon to show up, so check back periodically for more details and information on other exciting products and services.

EP RACING VG30 BILLET MAIN CAP & GIRDLE KIT

Been a long time coming that the VG30 crowd has been in need of a better setup for housing the crankshaft.  The stock girdle is riddled with flexing issues and being made in a single piece design makes it a machinists nightmare to do a line hone job on the main saddle (housing bore).  The need of keeping the crankshaft fixed can be challenging but now its going to be made quite easy with our new billet main cap system.  Made of billet 4340 these are precision cnc machined and come pre-bored to within .005″ off center so the end user has less work in having the main housing bores sized accordingly.  You will still be able to retain the standard ARP 8740 main studs or you can opt to purchase L19s (not required or suggested) but if you want to go that route you’re more than able to since this main cap system you are able to hone/size each cap independently from another.  Main caps will be black zinc coated to prevent corrosion and come ready to be final machined.

In addition a new billet girdle has also been designed to lock in all the caps together to give the lower housing even more rigidity.  Made of the same 4340 material you’ll be reassured that the quality and attention to detail are second to none and offer the best solution for the lower end of your VG30.  This kit works for both VG30E models as well as the VG30DE (TT) models.  An upgrade to the caps that will be available is an exterior oil shed coating which aids in keeping oil drained back down to the sump of the oil pan.

No pricing or ETA yet but check back for details soon.  Hoping to debut the final production part beginning of the new year.

EP RACING Z31 FORGED PISTON KIT

This is the newest forged piston out on the market that we have designed in conjunction with CP Pistons. This is a true 9.5:1 piston. Once compression is calculated this piston puts the engine at 9.2:1 compression PERFECT for boosted applications.  GTP inspired to bring you the absolute best in performance, these pistons model the early style pistons that were used exclusively in the GTP series back in the late 80’s and early 90’s GTP SOHC engines. A blend of the old school with the new school these pistons feature attributes from a SOHC cylinder head profile (2 valve) and coupled with a DOHC lower half design features based off the DETT model engines.  Z31 owners get the best of both worlds!

Piston Specs:

  • Full Forged 2618 Aluminum
  • Twin oil feed with radial groove for pin bore
  • HD wristpins
  • Full floating pin bore design
  • Lateral gas ports
  • Steel Nitride top ring
  • Napier Second Oil ring standard tension
  • Flat top design
  • Valve reliefs are 1mm over sized for aftermarket valves
  • Radial side wall for added strength

Available in any bore size, the customer has an endless selection at his or her disposal. 94mm pistons shown below.

Pistons are made to order and take approx. 4-6 weeks for completion.  Please feel free to email me for pricing and or questions.


EP Racing VG30 8QT Racing Oil Pan

Oiling systems,  they plague us in the VG30 world.  Hell nearly every engine has an oil deficiency but its what we do to correct the issue that makes or breaks us in having reliable engines.  The VG30 has a small oil pan capacity of 4qts…yes that’s right!  You read that right 4QTS!!!!  A pure bread pedigree Nissan work horse was only given 4qts of oil for its survival, that’s extremely low for the amount of oil this engine really utilizes.  So what does one do?  Well after seeing what options were on the market and what was being sold for the VG30 I decided to make the ultimate wet sump oil pan that brought all the facets of modern day racing technology to the Z32 community.  I spent right at a year developing a new racing oil pan of which took countless measurements to ensure what was about to be designed and made was in fact the best pan people could buy for their Z32.

I decided that once my figures were solid I would contact Moroso to produce my design.  I chose them as they are unquestionably the world leader in oil pan technology.  The second you mention Moroso you immediately think oil pans and oiling systems, so of course this was the right decision to make.  I made the call over to them and spoke with some of my buddies I knew back in the R&D department.  Gave them the run down on what I wanted and they drew up the CAD drawings to showcase what my vision was.  The first design sort of resembled the stock pan but on more of a race feel look and approach.  It was only rated at approx 6qts….still not enough for my liking and I felt we had more to improve upon.

A test pan was fabbed up and sent over to me to do a test fit and see how things were.  Again as I mentioned there was more improvements but without a rendering in front of me to physically test out I was only speculating at best on where we could go.  So I mocked up the test pan and dropped a block in a chassis I had and noticed a BUNCH of extra room that could be utilized.  So back to the drawing board I went into improving my design.

So as you can see a lot of room was still present for me to occupy.  This lead to me designing a new and improved version which incorporated a secondary kick out, drop back front on the sump, a newly designed oil pick up tube, and a windage screen.

With this rendering I was 100% a go with the production.  A last few minute updates to the pan and it made it a bit easier for the pan to be installed for when you drop the engine in and a few provisions for oil returns and oil cooler return was done.  I also integrated an oil temp sensor bung for ppl to utilize for data logging.  I thank the members of tt.net for bringing up that valid point to have it included.

Here is the newly designed oil pick up tube.  This new design allows users to clean the screen portion between builds unlike the factory cone style which has to be replaced.

Here are the pans being made at the Moroso facility.  Professional grade!

Pans get final test with checking for leaks and then sent out to be black zinc coated.  This prevents corrosion and gives the pan a well deserved clean look!

And now finally back at my shop fully assembled to a race engine.  This oil pan screams performance.


To date this oil pan is the largest and best equipped oil pan on the market for the Z32.  A lot of time and effort went into producing this pan for the community.  I want to thank Moroso for bringing my creation to life, Rich @ RDZ, and the feedback from the community.  Without you guys this project couldn’t have happened.

Oil pan specs are:

8qt capacity

Constructed of brand new sheet metal

4 trap doors (45 degree tilt)

Newly designed pick up tube

Built in Windage Screen

Magnetic Drain Plug

Oil Temp Sensor Provision

Zinc Plated

Twin Kick outs

If you have any questions please feel free to email me at tech@epracing.net

Oil pans are available for purchase now!

GT30s w/ a New Look on Life

Alex P. contacted me some time ago to discuss availability on my oil pan and a few options for his engine, this lead to a long conversation which ended with him getting a full build done.  I was excited to talk to him because of what parts he was running and planning to do with his build.  Its not everyday you get customers willing and wanting to invest into their assemblies like he was doing.  It was a real treat to work on his outfit.  Alex is utilizing a few upgrades to include my newly introduced 8qt racing oil pan.  When the time came to finally fit the pan onto the block, it just looked like it was meant to be.  This entire build was an honor for me to do.  Alex spared no expense in getting the right work done.  I’m eager to see what kind of power he makes with this setup.

Mod list includes:

EP Racing Spec Block

Wiseco Pistons .040″

Pauter Rods

Clevite Main & Rod Bearings

MSP Manifolds

Garrett GT3071s

EPR HSO Modified Crankshaft

EPR Ported Oil pump

EPR 8qt Racing Oil Pan

EPR Bearing Coating Service

EPR Piston Coating Service

EPR Black Onyx Turbocharger Coating Service

EPR Manifold Coating Service

All new gaskets/seals & check valves

JWT valve springs

Mild Ported Cylinder Head

Stock Cams

950HP Shortblock from HELL!

I got a phone call from Mr. Petar K.  that I’ve been helping throughout the years.  He called me looking to possibly get an engine built.  Of course I was eager to build something for him so we discussed options and narrowed in on what could be done for his needs.  He had a severe deadline which sort of had me worried but everything was contingent on his decision that had to be made by that following Monday.  Monday came and he pulled the trigger to have a full short block assembly made.  I was sweating bullets to get him this block done and it came together without issue and done actually a little early.  Knowing what this short block was capable of, I certainly had no idea what his final plans were (turbos etc) till after he came and picked up the engine but knew what type of power he was aiming for.    Fast forward a week later and I called to check in with him to see how the progress was going with the rest of his assembly.

Things were going together as planned.  He was anxious to get things up and going for the up and coming dyno day he was scheduled for.  Everything installed and running smoothly, he pulled up on the dyno and pushed out a whopping 789RWHP / 950BHP!  WOW… I got a call from my Petar after he had gotten tuned and he was very excited that he just put down this type of power.  I sat back and was in awe that something I just built with good parts and a solid attention to detail just put down an obscene amount of power.  I mean as an engine builder you build your outfits to handle the power (and some) but it put my modifications to the test and it shined the entire rev band.  It makes me happy that I can see my assemblies work like this especially when I have customers as excited as I get when I get the news.

My hat goes off to you Petar!  Have fun and be safe out there!


Petars Mod list:

EP Racing Spec Shortblock

CP Forged Pistons .040″

SCAT H-Beam Forged Connecting Rods w/ ARP Rod Bolts

Clevite Main & Rod Bearings

EPR Bearing Coating Service

EPR Piston Skirt Coating Service

EPR HSO Crankshaft Modification

EPR Cylinder Bore Coating Service

JWT R5 Camshafts

JWT HD Valve Springs

ARP Headstuds

MSP Manifolds

Garrett GTX 2867 Turbochargers

WIN Factory Fuel Rail Kit w/ 1000cc Injectors


Why L.S.O.S (Low Speed Oiling Systems) fail on high performance engines

Its no surprise that the more our technology improves the more we take the article we are working on and put it through more stress.  Our technology also has combat this issue with increased efficiency as well.  Its a pure trade off of sustainability and consistency.  The more we push the more it wants to resist so we work harder at ensuring we don’t damage what we are trying to obtain (HP/TQ etc etc).

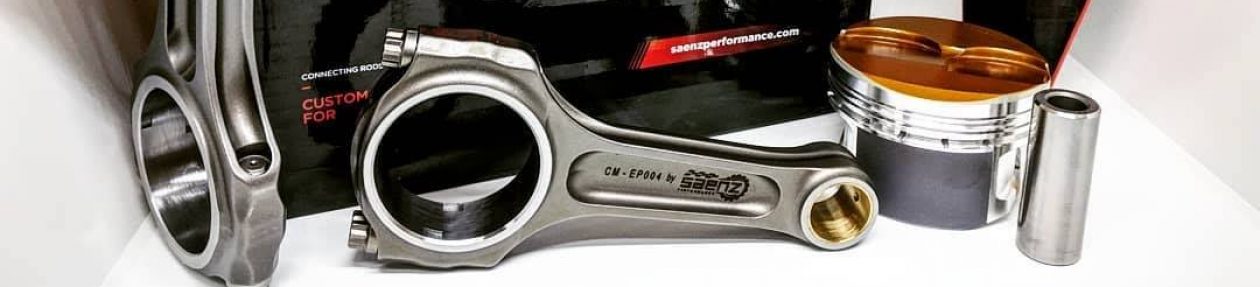
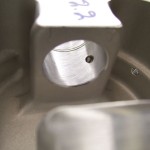
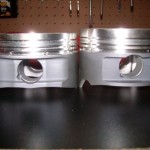
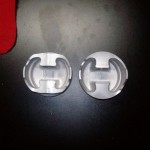
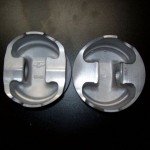
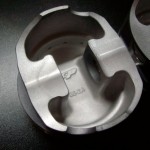
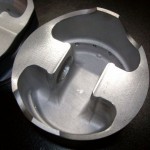
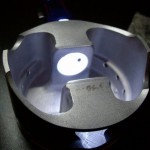
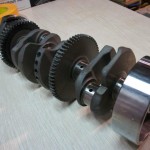
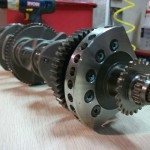
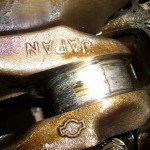
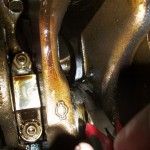
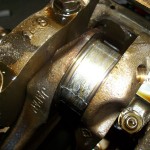
I want to talk today about the oiling system in VG30 engine.  For years this system has worked as a standard method of oiling.  It was engineered and designed to work for economic status in mass produced outfits.  This particular system is referenced to be known as a Low Speed Oiling system which utilizes the cross drilling of the crankshafts oiling ability (see images below).  This system works great for outfits that are used for everyday use where it doesn’t see excessive RPM and load and isn’t put through an strenuous scenario continuously.  Nissan did a good thing in utilizing this system in every platform (to my knowledge).  With the introduction of the performance world increasing power and tq on this system put this LSOS into a crippling disadvantage.  For years people have been running the stock system relying on the age old theory of “If Nissan ran it like this, it should be fine for what I’m doing” or “He’s making X amount of power and he’s still using the stock system” well that may be true but that doesn’t mean its right.  Nissan uses the system as an economic basis to ensure their engines and protect them from oil starvation.  But this only truly works on the outfit running at optimum conditions.  Essentially where the manufacture rates the power output based on red line performance from the factory, anything above this and you start damaging the system as a whole.  Fact of the matter is, if you are driving beyond normal driving practices essentially city driving you are putting the LSOS in a deficiency category.  Of course many owners that take their cars and upgrade them to produce more power really put the engines lubrication system in a backwards spiral and eventually to a catastrophic demise (bearing failure)


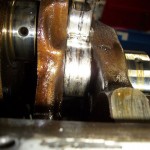
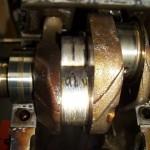
So what does this all equate to?  Well its simple really, cross drilled crankshafts are old technology and are the demise of the oiling system in any engine that utilizes it.  The more power/abuse you put on this system the faster it will wear out.  I’m not going to sit here to tell you that others are wrong for not addressing this issue in their engine but I will say that it should be at the top of the list of things to update/upgrade if you are planning on building your engine.  We all know that the VG30 (and pretty much any other Nissan with a cross drilled crankshaft) has rod bearing issues.   Some pin the issue on rod journal size, oil pump volume capabilities, oil pan problems etc etc.  Those do play some part in the issue but it is significantly smaller than the direct oiling system provided through and in the crankshaft.  With this specific oiling system what happens is quite interesting.  If you can imagine for a second a pencil and at the top of this pencil you’ve glued a round disc.  You take that disc once its been adhered to the pencil and you put it in any fluid, lets use oil as an example.  Now take that same pencil with the disc that has all the oil on it and move the pencil back and forth between your hands (rolling it forwards & backwards) What you will see is that the oil is being slung off the disc on all axis of the surface area.  What you are seeing is the birds eye view of what the oiling system does in a VG30.  So you’re thinking..“looks fine to me, whats the big deal?”  Well the deal is that once the oil is left the disc is much drier than before when it had all the oil on it, now add oil pressure lets say 90psi (average for the VG30 platform) so now not only are you slinging the oil off the journal drying the bearing and journal out but  you’re actively forcing the oil off the wear surfaces.  FAIL ON SO MANY LEVELS!!!  This is the culprit for rod bearing failures in approx 90-95% (I’d professional say) on the VG30 platform.


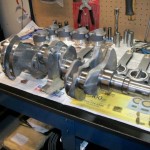
So how does one fix this issue?  How can I eliminate further damage and more money being sucked out of my wallet?  Well if you’re in the midst of building your engine, any engine that uses a cross drilled crankshaft you can find a machine shop that can modify the crankshafts oiling system to properly distribute oil.  Here at EP Racing we do this to nearly every engine that is built.  The customer is educated on the involvement and why its crucial and how it will benefit the engine and on a long term benefit the customers wallet.  I am fully setup to handle this form of alteration in house and have been doing so for nearly 3 years now.  To date I am the only Nissan machine shop that is dedicated in improving the oiling systems and that offers this upgrade.

I want to share with you a report written by David Reher of R.M.R. E here in Arlington, TX.  His information is invaluable and I am lucky to have a close friend that was the head machinist that used to work in their machine room.  With information from my friend and Davids experience and knowledge of this issue it sealed the deal in closing the door on an apparent problem that’s plagued the Z32 and other platforms for years.

Written by David Reher

 I’ll begin with a rather bold statement: Don’t use a cross-drilled crankshaft. There are a few exceptions to this rule, but under most circumstances, a cross-drilled crank is going to cause big problems.

Unfortunately cross-drilling is one of those terms that’s become part of the jargon of hot rodding. People who know very little about racing engines have heard of a “cross-drilled crank,” and mistakenly believe they’ve got to have one. In fact, cross-drilling simply refers to the position and routing of the holes that carry pressurized oil from the main bearing journals to the connecting rod bearings.

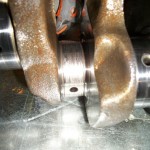
In a cross-drilled crankshaft, oil feed holes are drilled completely through the main journals so the passages are open on both ends. Holes from the rod journals are then drilled at an angle to intersect the holes in the main jouranls at the centerline of the crank. This system was thought to ensure a continuous supply of oil to the rod bearings because one end of the passage drilled through the main bearing is always exposed to the pressurized oil in the upper main bearing insert.

So what’s wrong with this picture? The pressurized oil that enters the feed hole through the main bearing journal must overcome the centrifugal force created by the rapidly spinning crankshaft before it can reach the passage to the rod journal. If the pressure created by the oil pump is not strong enough to counteract the centrifugal force that is pulling the oil away from the rod journal feed hole, then the rod bearing is starved for lubrication. Since the pinwheel effect of the centrifugal force increases with rpm, when the rod bearing does run dry and seize, the resulting carnage is usually catastrophic.

I learned my lesson about cross-drilled crankshafts the hard way. Back in the early ’80s we started to turn our engines faster. We’d been running stock Chevy cranks in our 287-cubic-inch small-blocks and B/ED motors without any problems. Eventually the supply of usable cranks became exhausted, so we ordered aftermarket cranks – “California cranks” as my Texan friends called them. These cranks were much prettier than the factory forgings, and they all had trick cross-drilled main bearings. It didn’t take long for those cranks to turn blue when the rod bearings burned, sometimes on the first or second dyno pull. Then we’d bolt in an old 283 crank and the engine would live forever. So what was the difference? The difference was the cross-drilling.

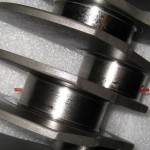
Today most racing crankshafts have a “high-speed” oiling system, which is essentially just how Chevy drilled those stock cranks. The oil feed holes for the rod bearings intersect the main journals at or near the surface of the journals. The pressurized oil does not have to overcome centrifugal force to reach the oil feed holes for the rod bearings, so the supply of lubrication is constant even at high rpm. There have been some refinements made to the angles and positions of the oiling holes to “time” the oil supply, but the basic design hasn’t changed significantly.

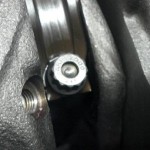
It’s easy to spot a cross-drilled crankshaft. Insert a piece of welding rod or coat hanger wire into the oil hole drilled in the main bearing. If the wire comes out the other side, the crank is cross-drilled. My advice is not to use it.

It is possible to crank up the oil pressure high enough to overcome the negative effects of cross-drilling. However, excessive oil pressure creates its own set of problems, increasing parasitic losses due to windage, excessive oil on the cylinder walls, and the power that’s consumed by turning a high-pressure oil pump.

It’s possible to manufacture a 5-inch stroke big-block crankshaft without cross-drilling the main journals. However, as the stroke becomes longer than 5 inches, the overlap between the main journals and the rod journals is reduced to the point that there is insufficient material for the oil feed holes. The crank manufacturer must then change the angle of the holes and drill them to intersect a cross-drilled passage in the main journal. When using this type of long-stroke cross-drilled crankshaft, it’s absolutely essential to increase the oil pressure and install a big dry-sump tank, because this engine is going to circulate a lot of oil.

It’s critical for anyone assembling an engine to inspect the crankshaft carefully. The first thing we do with every crank that comes into our shop is get out a pen light and a welding rod and check the oil holes. It’s not uncommon to find an oil feed hole that’s blocked or not drilled quite far enough. When assembling an engine, make sure that every oil passage is open and drilled where it is supposed to be.”

Here is more information written by SCAT Industries (SCAT CRANKSHAFTS)

SCAT TECH

“SAY NO TO CROSS-DRILLING”

“The shortest distance between two points is

a straight line.

Nowhere is this more true than in the straight shot oil system

designed into all SCAT cranks. With the throw at 12:00 the oil enters

the main bearing between 6:00 and 9:00 depending on journal size

and stroke. The oil passage goes straight to the throw and exists at

approx 1:30 to 2:00. RPM of the crankshaft unlike cross-drilling has

no effect on oil delivery to the throw.


What is cross-drilling?

Cross drilled cranks have oil feed holes drilled completely throughout

the journals. Sometimes mains only and sometimes mains and

throws. An angle hole is then drilled from the throw to the main on

the center-line of the crank. Some think this system, because both

ends of the cross drilled hole are exposed to oil supply, will ensure

continuous supply of oil to the rod journal.


WRONG!!

Pressurized oil must enter the main journal and overcome centrifugal

force of rapid acceleration or RPM to reach the center of the crank

before the oil can travel to the throw. Only increased oil pressure will

overcome the “crack the whip effect”. In most cases it will not and

the result is a very expensive rod failure. For sure you do not see any

NASCAR team using cross-drilled cranks.


 SCAT’S COMMITMENT

SCAT is committed to manufacturing only the highest quality

crankshafts and we WILL NOT cross drill cranks even though the

process is easier and cheaper.

So after reading this information myself and talking to Mr. Reher personally as well as involving my friend in the idea I wanted to do about resolving the issue with the crankshafts I pressed forward in doing the work.  From day one since then I can happily report not a single rod bearing issue has ever been reported and some of these engines that are utilizing this updated system in the stock crankshaft run in SCCA events, not to mention quite a few drag race applications as well.  Some reading will say “well man all you’re doing is regurgitating information”.  To some extent yes, but this import scene has never really dived into this issue like I have.  I’ve discussed on several occasions the importance of doing this coupled with a few other upgrades to be included with the outfit and some listen and took note and others stuck their noses up at it and figured I was just full of crap.  Well the proof is in the pudding folks.  There’s a reason for everything and if done properly and well executed can prove significant gains.

So next time you’re in the situation where you need your engine rebuilt, I want you to think about what I’ve said here in this tech article and think about what Mr. Reher has said as well.  Its important to me that my future customers know certain criteria to better help them in making important decisions.  We all know money is a factor in building and everyone has a budget but I strongly urge individuals to fix the apparent issues first before one goes and dives in the “building HP” category, because your engines no better than its ability to stay alive.

Thanks for reading.


AOCO 2012

All Out Call Out (AOCO) is a heads up drag event held in Albuquerque, N.M and features some of the fastest cars in the area.  This event was first started back in 2011 and this year on May 19th 2012 the second annual AOCO went off without a problem, bigger and better than last year.  I was first approached by Alex Hanhardt of N.M Imports earlier in the year about this event and he wanted me to be a part of it.  He explained the rules and regulations and the expected turn out.  He sent me the website link to where I could see the buzz that was being generated and I was really impressed with how well Alex and his crew were organizing the event.  After much talk back and forth over the phone I (EP Racing) decided to extend some gifts to help sponsor the event.  I was eager to know how big this event was going to be so as the date was getting closer I thought to myself, “maybe I should take my wife and we both go out there to make a physical appearance”.  Well the decision was made, my wife happy that she was going on a mini vacation and that our anniversary was around that time as well, so it was a win/win situation for us.

So I bought the plane tickets, scheduled off, packed our bags and off we went.  Got to DFW airport and waited patiently to board.  My wife and I talked about what New Mexico was/would be like.  Of course we’d never been there so we truly didn’t know what to expect.  Fast forward to 3 hours later.  MARS…thats right folks, if you’ve never been to New Mexico and you are on your final approach to the airport all you can think about is the planet Mars.  I joked with my wife about it and sent a text message to let him know we had landed and were going to get our rental and head his way.  We stayed at the Hard Rock Hotel & Casino (got some killer rates) which was really nice.  We checked in and proceeded to N.M Imports to meet up with Alex for the first time.  We hung around the shop some and then a black Z32 rolled up.  At first I was thinking to myself, “who’s Z is this?”, then out pop Jeff Algarra or as we affectionately like to call him “Jeffe”.  I also met Mike Taddoni who is the owner of Garage Built Rides and he was one of the big players to help get this event going.  It was nice to finally meet these guys in person and talk shop and so forth.  After about an hour or so of shooting the shit we all got together and went out to dinner and planned out the day of the event.  Lots to do and lots to organize so we all discussed things, I offered to help as much as I could and we left dinner to rest up for the day ahead of us.

May 19th,  dry heat, windy, about 87 degrees outside.  It was warm but a good warm.  The event started at N.M Imports for the Meet & Challenge preview.  This was setup so that the racers could do their “call out” and meet the individuals they planned to race against.  But remember, this was a heads up race so this was a first hand look for those that were participating to get a who’s who out there.  My wife and I showed up to check out the buzz and see how many ppl were showing up.  MASSIVE turn out!  I couldn’t believe the amount of cars in this area.  Made DFW, TX import scene look a bit weak in my opinion but none the less I could already tell this event was going to be really good. So I’m looking around and then start to see all these cars leave and head directly to the track, yep thats right…this All Out Call Out requires the racers to show up to the Meet & Challenge either by trailer or driving the car itself to the event but then they MUST drive the race car to the track from the meet.  This was the rule to qualify to enter the race/event.  I thought this was great because it put a level playing field for everyone.  When’s the last time you saw a Z32 with huge Hoosier slicks hauling ass down the high way driving to the drag event?  I surely haven’t as I’ve always seen them on a trailer.  This is what set this event apart from all the rest.  The fact it was a requirement made it that much more interesting to me.

So we leave the Meet & Challenge and head to the track.  For being out in the middle of no where….literally, this place was really well maintained.  It had a good feel and the racetrack was pretty clean.  Don’t find that too often anymore.  So people started rolling in, all sorts of Domestics and Imports, people from all over started showing up, it was turning out to be one hell of a show!  Members of the AOCO organization were busy, with having ppl register and running practice sessions it was really a busy scene for them so I stepped up and handled the grill.  Yea I know what you’re thinking,  “why would you cook when you’re on your anniversary with your wife”  well its simple really, these guys were beyond busy and I wanted to help out as best I could to give them a little break from running everything else.  It was the least I could do.  I was a cooking machine!  I spent nearly 4 hours cooking but I had fun. I got to meet a lot of ppl and business owners in the area and saw some amazing cars!  I didn’t get to see much of the racing but it was nice to just be a part of the crew not only for donating gifts and helping sponsor the event but to physically get in there and help them.

After the cooking was done and I had a chance to wind down for a little bit I decided to head back to the hotel.  I was sun burnt, tired and exhausted from having a busy day but I had so much fun!  My wife and I didn’t get back to the hotel till about 2AM!  Yea LONG DAY!  I thoroughly enjoyed myself that weekend spending it with good ppl and new friends and my amazing wife.  I want to thank everyone from N.M Imports for their hospitality and making us feel at home.  I look forward to next years AOCO and will absolutely make my second appearance in 2013.  If you’ve never heard of AOCO definitely go check this even out.  You won’t be disappointed.


Special thanks go out to:

Alex Hanhardt

Stacy Hanhardt

Jeff Algarra

Nicole Algarra

Mike Taddoni

Kyle Padilla

All the rest that made this event possible!

Breathing FIRE

If you’ve checked in within the past week or so you’ve seen the update on my project for EP Racing “Grey Goon”.  I’ve already begun the path in getting outfitted for new parts for this chassis.  This particular part(s) are the exhaust manifolds that are being built.  (Specs soon to come) The beauty of these manifolds is that these will be one of the very few tubular manifolds that are fully equal length in design and will utilize a true vband setup.  Im keeping my turbo selection under wraps for now but what you guys can know is that I’ll be running an external wastegate setup along with Tial stainless steel vband turbine housings.  Quality is at an all time high with these manifolds and once completed and tested will be available exclusively right here at EP Racing.

Stay tuned!!!

Power – Engine- Design